Coloring Dry Embossing Starting 1/7/15

An open ended midweek challenge to give you a little bump to get through the rest of the week! Begins on Wednesday mornings.

Moderator: eoconnell

There are lots and lots of ways to color dry embossing. You can dry emboss with an embossing folder, then use pencils, pens, markers, etc. to color in specific areas. You can run an ink pad along one side of an embossing folder, then close it and run it through to get ink either raised, or depressed, depending on which side you put the ink on. You can emboss using stencils or templates and color in areas on those in the same way. You can use sand paper to expose the core of your paper after you emboss. You can use mists/sprays, etc. to color, too.

For this challenge, I'd like for you to dry emboss (however you want), then run an ink pad lightly over the top of your embossed sheet. This adds ink to the raised areas. The more you go over it, the darker the ink gets. Start very lightly! You can always go over it again.

It sounds like it wouldn't possibly work, but it really does. I like to lay the ink pad almost flat along the paper as I move it along.

5-26-14 SZ Animal (300x205).jpg
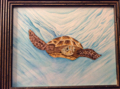
5-26-14 SZ Animal (300x205).jpg (80.62 KiB) Viewed 908 times
These were done just running the black ink along the top. You can tell on the first one I pressed the ink pad down too hard, so it got all over the "white" space, too. However, after I made the mistake, I just went with it, hence the gray everywhere.

12-28-14 STV 9 Letterpress (256x300).jpg
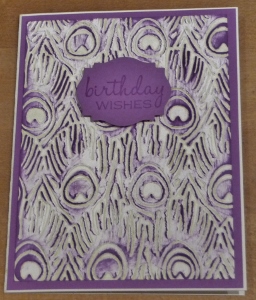
12-28-14 STV 9 Letterpress (256x300).jpg (101.17 KiB) Viewed 908 times
This was done by putting one ink color in the embossing folder to be depressed into the grooves, then running the other color over the top.

I can't wait to see what you come up with! Remember, this challenge is open ended, so play along when you can.

Participants:
Marilyn
Terrie
Trudi
Sheri
Last edited by Golda on Tue Jan 13, 2015 6:30 pm, edited 3 times in total.
Golda
GoldaPete.WordPress.com
User avatar
Golda
 
Posts: 4411
Joined: Sun Nov 09, 2014 7:05 pm
Location: Phoenix AZ

I just happened to have a stack of embossed card fronts that were made at Christmas (Sheri got lots of new embossing folders!) and I just tried this to see how much practice I was going to have to do to make this look good. NONE! It is easy and fast! I have to make 60 books in the next few months and needed to put the tree (like what I did with the owl on it in the violent post LOL). This is a whole lot easier that what I did there and looks better! Thank you, Golda! I will post my pic in the morning when the light is good! Thank you! THANK YOU!
Marilyn Brown
Artist
Facebook: Paintbrushbrown
User avatar
Paintbrushbrown
 
Posts: 279
Joined: Sat Nov 08, 2014 3:39 pm
Location: Crawfordsville, IN

I'm so thrilled you enjoyed it, Marilyn! Can't wait to see what you did.
Golda
GoldaPete.WordPress.com
User avatar
Golda
 
Posts: 4411
Joined: Sun Nov 09, 2014 7:05 pm
Location: Phoenix AZ

Golda, your cards turned out really nice....another great way to use these folders .
terrie
 
Posts: 2936
Joined: Sun Nov 09, 2014 5:46 pm

This will become a pocket page for a book I am making. The book is about fresh starts, new beginnings and taking time for the journey at hand. I am thrilled about this technique.
Attachments
Technique Challenge.jpg
Technique Challenge.jpg (78.9 KiB) Viewed 852 times
Marilyn Brown
Artist
Facebook: Paintbrushbrown
User avatar
Paintbrushbrown
 
Posts: 279
Joined: Sat Nov 08, 2014 3:39 pm
Location: Crawfordsville, IN

Fabulous job, Marilyn! I love how yours turned out. That flower is such a gorgeous pop of color on it, too.
Golda
GoldaPete.WordPress.com
User avatar
Golda
 
Posts: 4411
Joined: Sun Nov 09, 2014 7:05 pm
Location: Phoenix AZ

Golda, your inking looks great with your cute little birds! Thank you for hosting!

Marilyn, love that embossing folder! That can be feminine, manly, vintage, etc. I like the teal & brown combo too. Good job!
Elaine
eoconnell
 
Posts: 3621
Joined: Sun Nov 09, 2014 4:21 pm

Golda, I haven't tried this in a while. Your cards turned out beautiful!
I have ordered some new folders and I hope they come soon....

Marilyn. beautifully done!!!
Jane
Jane from Utah
 
Posts: 1020
Joined: Sun Nov 09, 2014 8:26 pm

Marilyn, well done on your card...I like the color combo that you used
terrie
 
Posts: 2936
Joined: Sun Nov 09, 2014 5:46 pm

Okay, my friends, even if you don't have any embossing folders, or a machine to emboss with, you can take something (anything really), hold it up against a window with your paper on top and trace around it with a pen cap (something kind of small at the end, but not sharp). Now, you have something dry embossed that you can color.
Golda
GoldaPete.WordPress.com
User avatar
Golda
 
Posts: 4411
Joined: Sun Nov 09, 2014 7:05 pm
Location: Phoenix AZ

Next

Return to "Hump Day" Bump

Who is online
Users browsing this forum: No registered users and 61 guests